Guide
How to photograph a listing on your phone — interiors
Updated July 2026
To photograph a listing interior on a phone: declutter first, hold the phone dead level at chest height, use the 0.5× ultrawide for the room-wide shots, and shoot each room when the sun isn’t blasting through its windows. Decide lights-on or lights-off per room (never mixed without matched bulbs), tap the brightest area to keep window detail, and take one wide, one mid-range and one detail shot per room. The rest of this guide covers each of those decisions and the technique behind them.
Photo quality moves money. Redfin’s well-known study found professionally photographed listings sold for thousands more relative to list price and weeks faster in the mid-market; Zillow research adds that listings with 22–27 photos sell fastest. The good news: the gap between a phone and a pro camera has mostly closed — what remains is technique. This guide is the interior half; the exterior & neighborhood guide is the other.
Lights on or lights off? (There’s an actual answer)
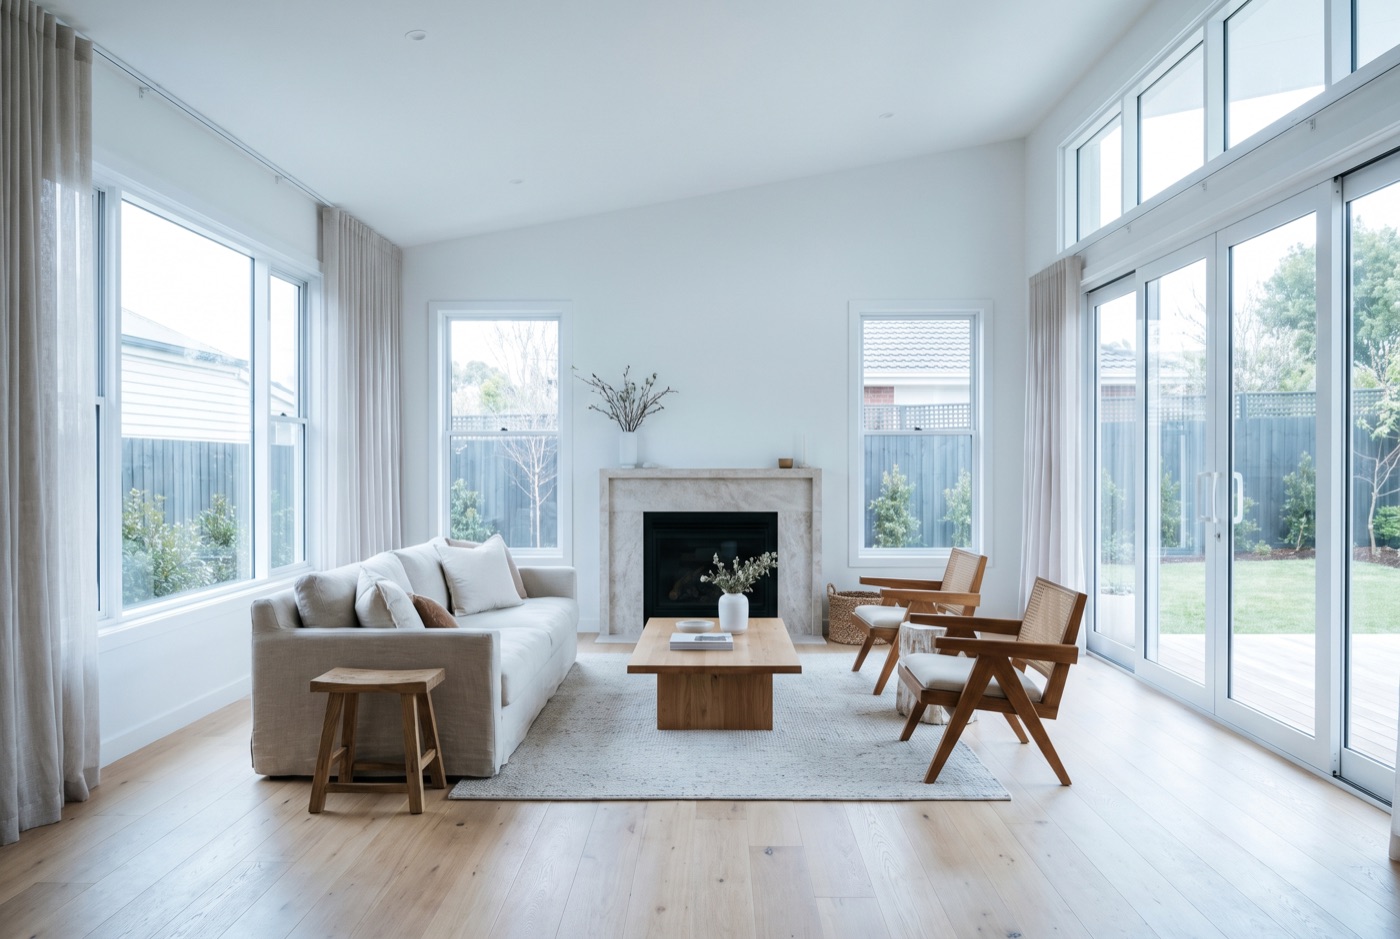
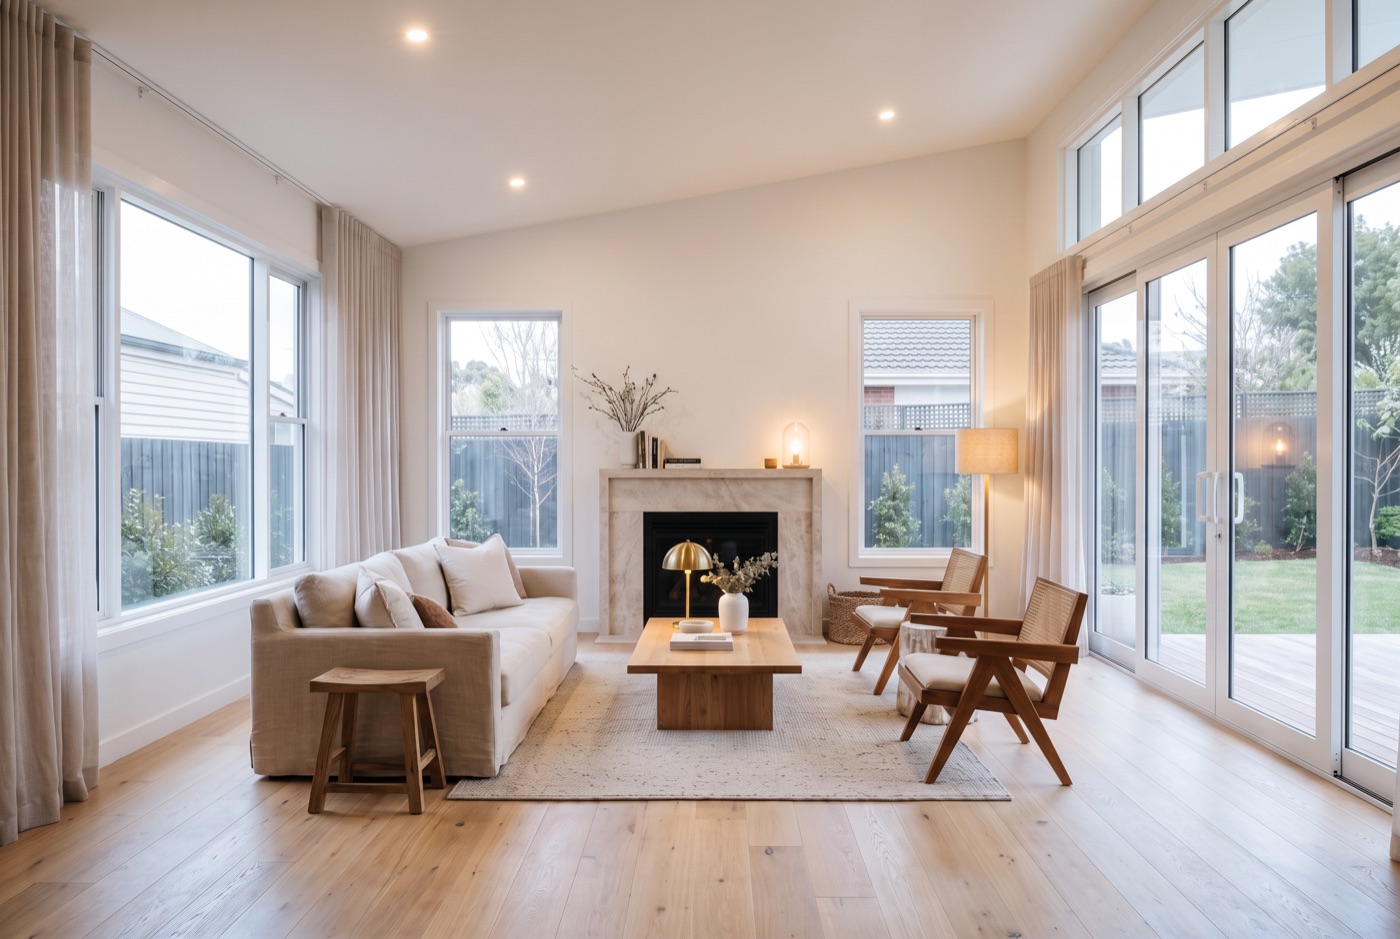
This is a genuine doctrinal split. Architectural and editorial photographers mostly shoot lights off: window daylight is one consistent color, it’s soft and directional, and ceiling lights read flat. Real-estate photographers mostly shoot every light on — lamps, under-cabinet, closets — because the warm glow reads inviting and it’s become the listing-photo convention.
The working decision rule:
- Lights off when the room has strong window light, light-colored walls, and no showpiece fixtures — you get cleaner, truer color.
- Lights on when the room is dim, windowless (bathrooms, basements), or the lighting design is part of the sell.
- Never half-and-half within a room without matching bulbs: daylight is cool (~5000K+), household bulbs are warm (~2700K), and the mixed yellow-on-blue cast is the one thing editing can’t honestly fix. Before a shoot, replace dead bulbs and match color temperature at least within each room.
The window problem
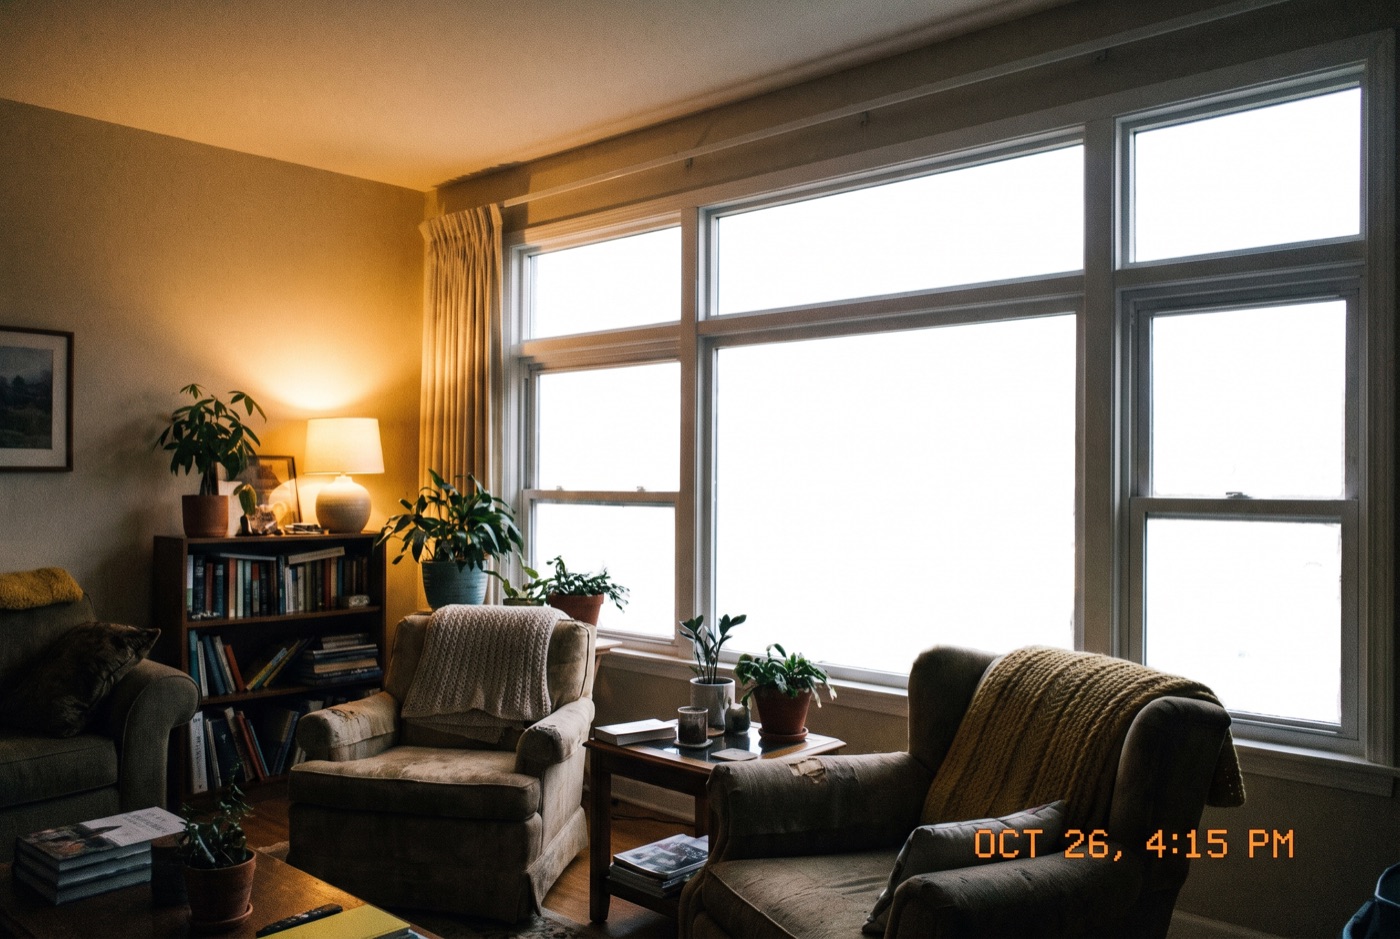
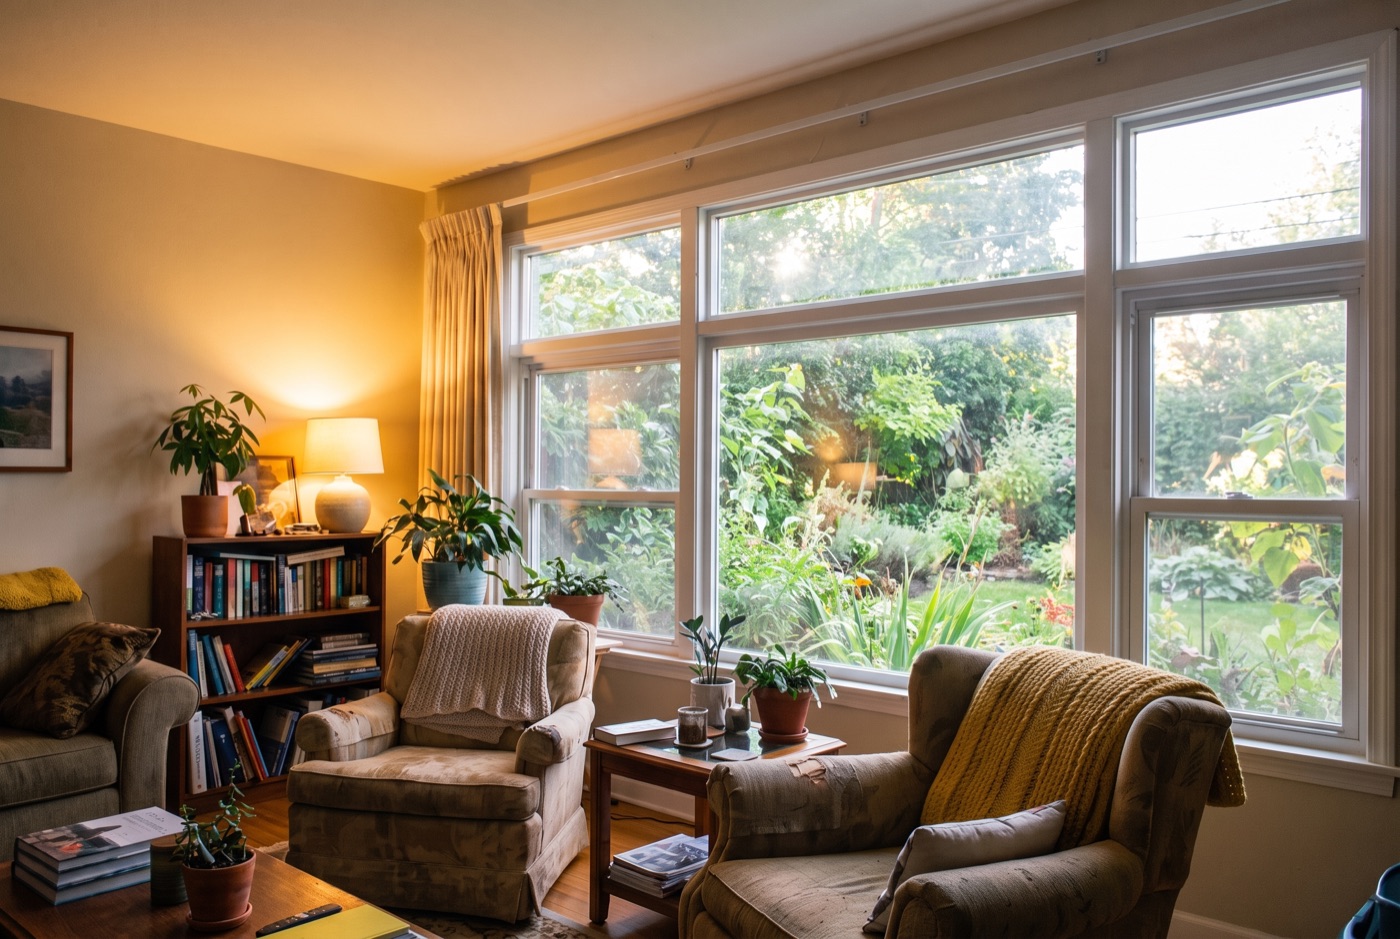
Point a phone toward a bright window and you get a choice: blown-white glass or a murky room. The range of light simply exceeds one exposure. Fixes, in order of effort:
- Let the phone work. Modern phones auto-merge multiple exposures (Smart HDR) — but help them: tap the brightest area to set exposure, then drag the slider until the window detail survives.
- Change your angle. A window square-on to the lens is the worst case; shooting across it rather than at it halves the problem.
- Change the time. Shoot each side of the house when the sun is not blasting through those windows (see below).
- Brace the phone. HDR merges misalign when you sway — elbows in, or rest the phone on a chair back. A $15 tripod is the single cheapest upgrade in listing photography.
When to shoot which room
Every room has a best hour, keyed to which way its windows face — the principle is sun behind the camera, not in the lens:
- North-facing rooms: flexible, consistent light — late morning to early afternoon.
- East-facing: morning. West-facing: afternoon.
- South-facing: early or late in the day; midday sun is harshest.
- Bright-overcast days are underrated: the sky becomes a giant softbox and every room shoots evenly.
Using the 0.5× ultrawide without it showing
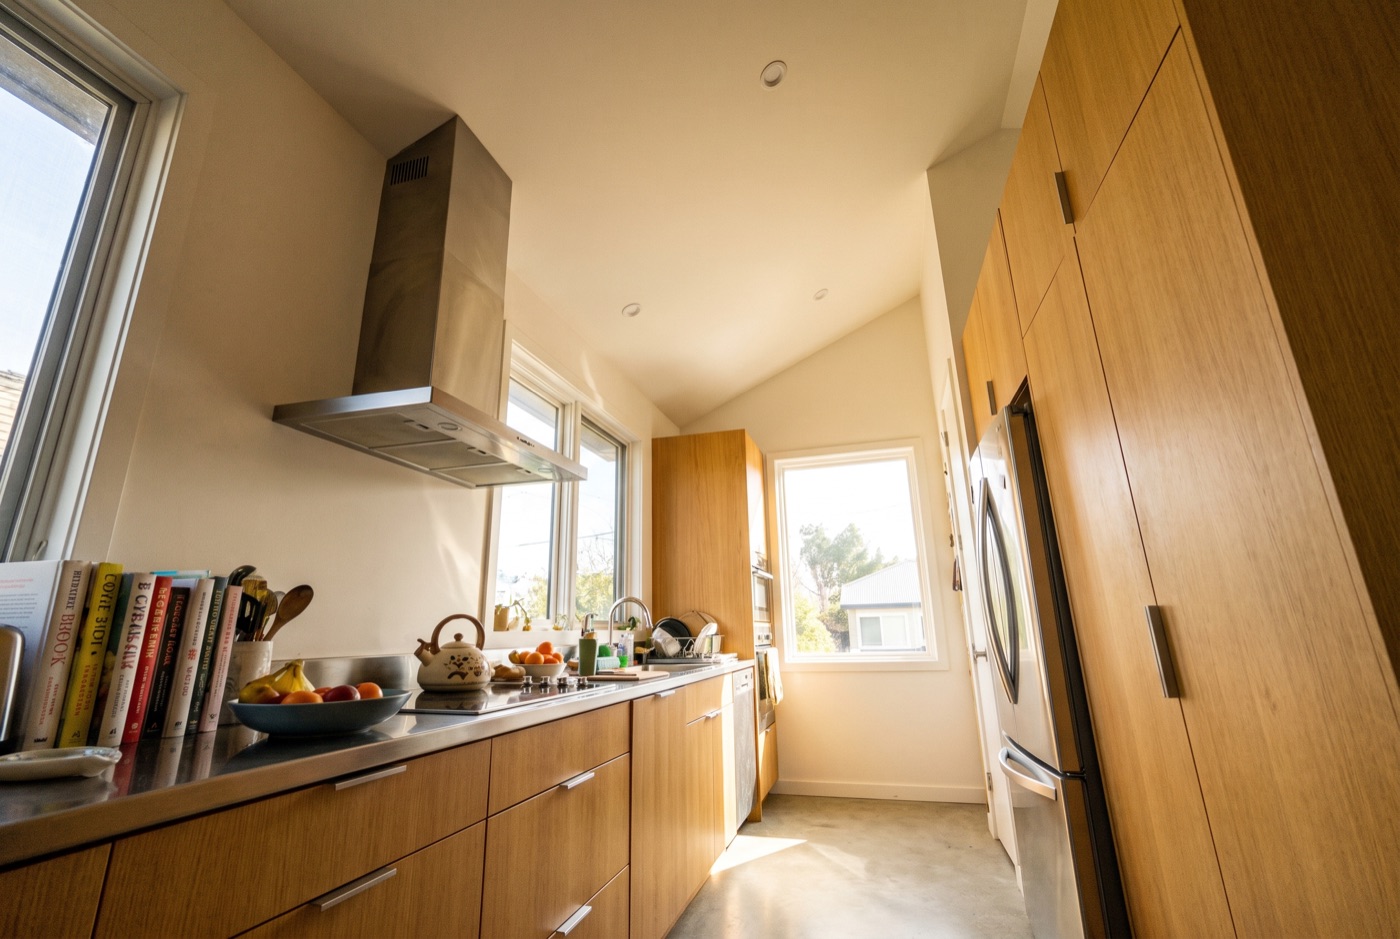
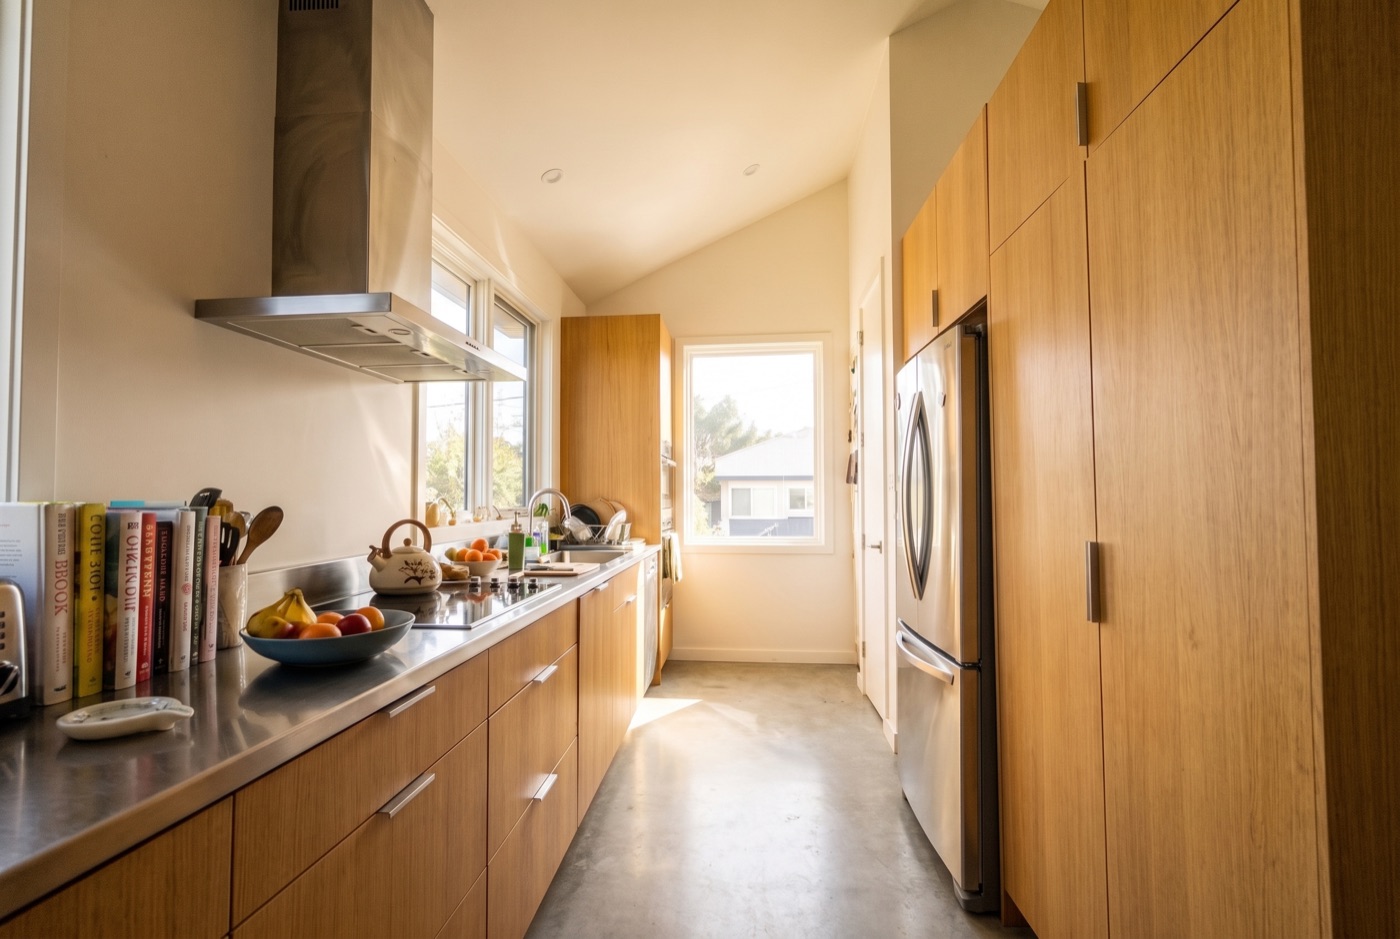
The ultrawide lens is the closest thing to a pro interior setup your phone has — it covers roughly the same field of view as the 16–24mm lenses real-estate photographers use. Three rules keep it looking professional:
- Hold the phone dead level, both axes. Tilt an ultrawide up or down and every vertical line in the room leans. Turn on the camera grid and level indicator and trust them — this one habit is most of the difference between amateur and pro-looking interiors.
- Shoot from chest height, not eye height (about 4–5 feet). You see furniture surfaces and floor space instead of the tops of cabinets, and the room reads the way it feels to stand in it. Go a little lower in dining rooms, a little higher in kitchens.
- Keep people and furniture out of the corners. Ultrawide edges stretch whatever sits in them. Compose with the important objects in the middle two-thirds.
And resist cramming: standing in a corner to force all three other corners into frame is the classic tell. Two useful compositions cover almost every room — straight-on (camera parallel to a wall: calm, symmetrical, minimal distortion; best for small or symmetrical rooms) and into-the-corner (two walls fanning out: more depth; best for large rooms). Wider is not automatically better.
The wide-plus-detail system (what makes listings feel “editorial”)
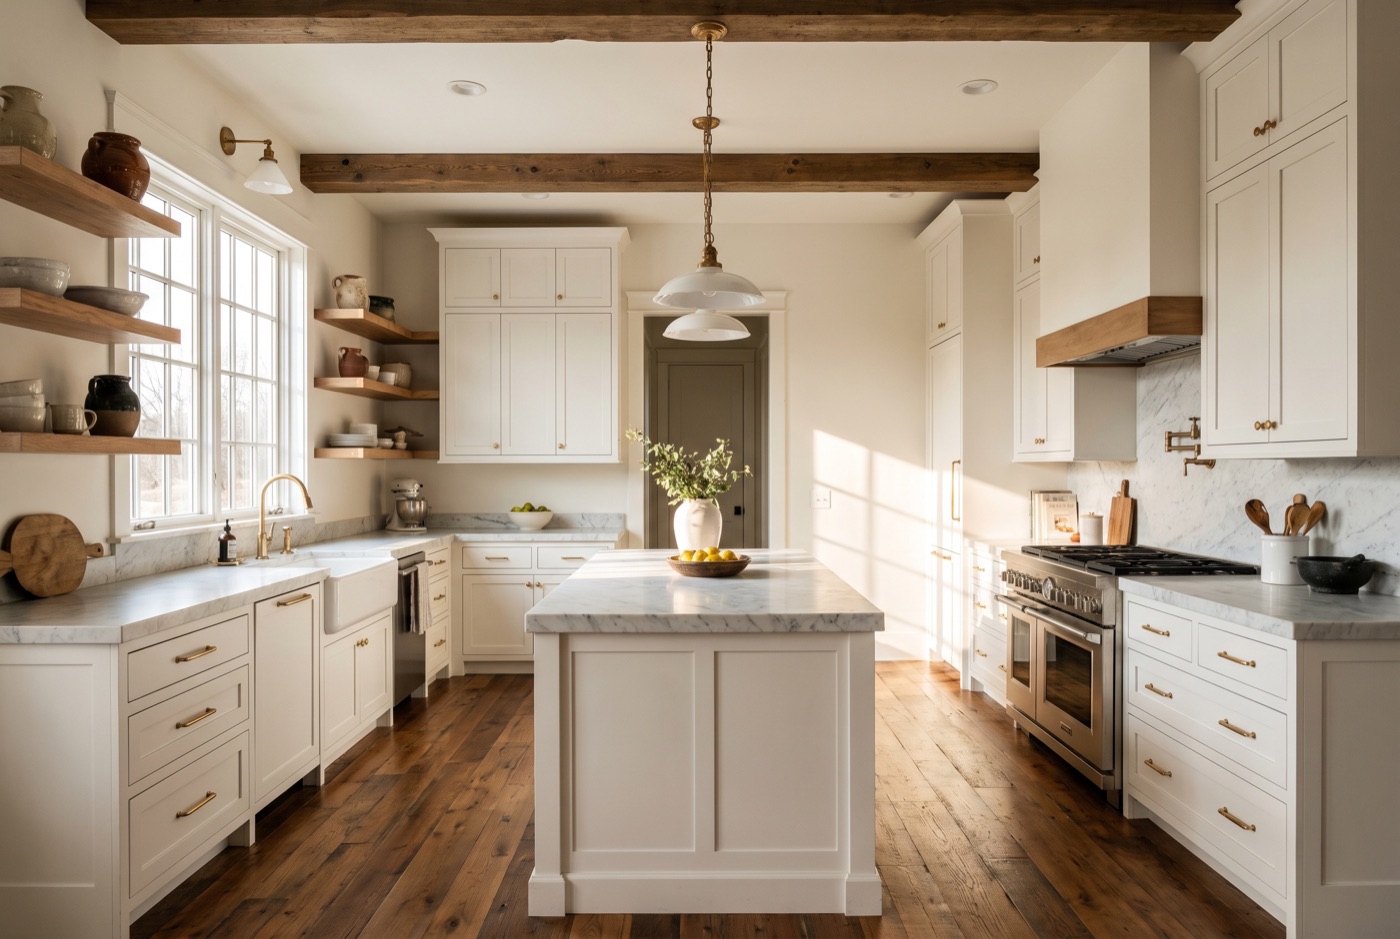
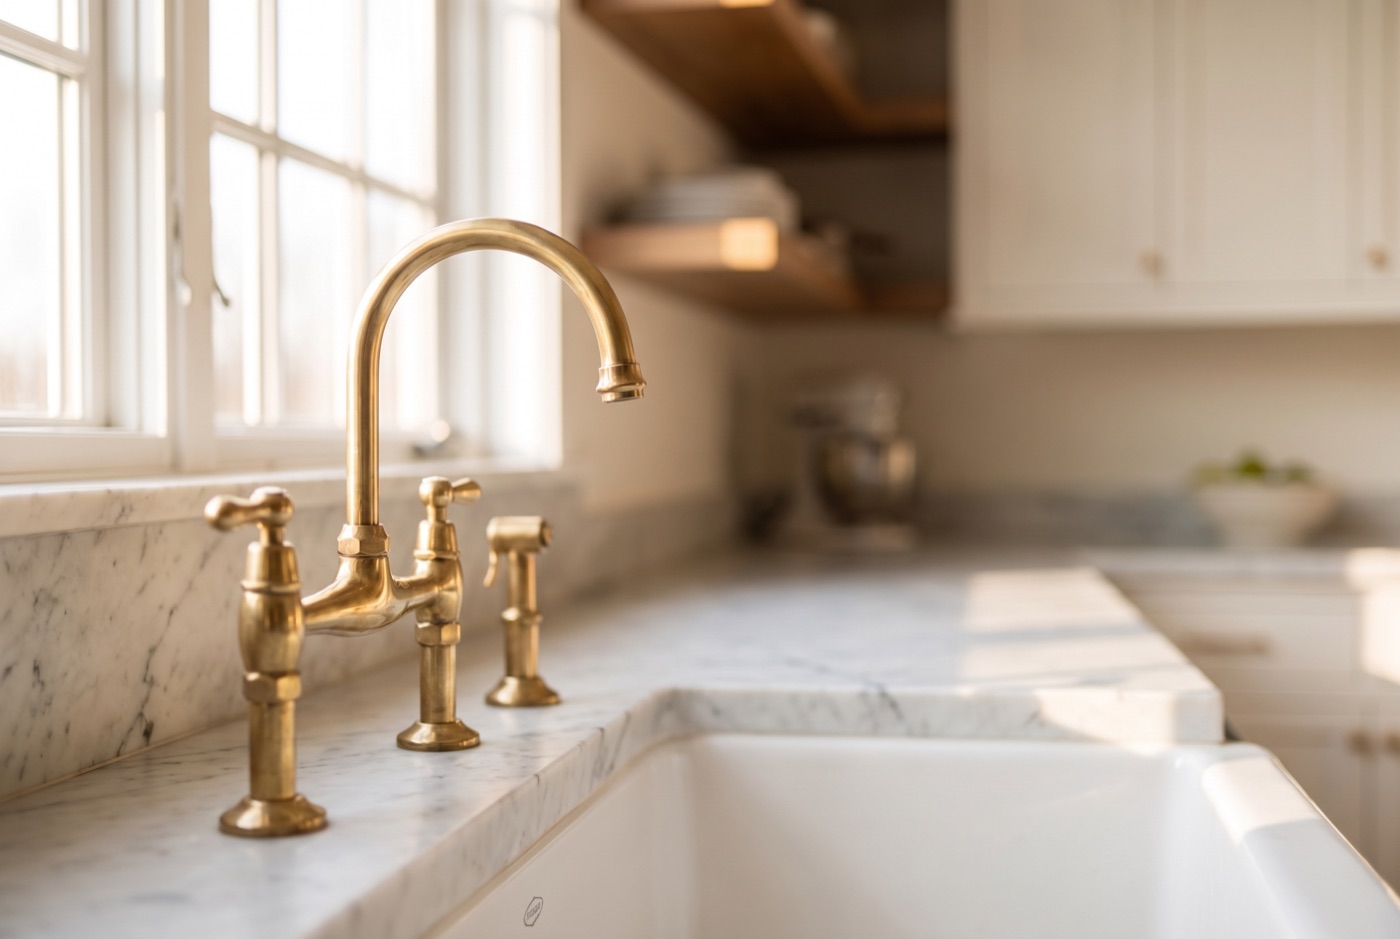
Open an interiors magazine and you’ll notice the rhythm: a wide room shot, then a tight close-up — a lamp, a tap, the fireplace corner. The trade calls those close-ups vignettes, and pro shot lists sequence them deliberately: overview → mid-range → vignette → detail. Wides establish the space; details carry the materials, texture and craft that wides flatten. The mix is what makes a set feel human rather than like an inventory.
Your phone’s lenses map onto the system directly: ultrawide (0.5×) for the room overview · main (1×) for mid-range compositions · telephoto or portrait mode for vignettes with softly blurred backgrounds. Per room: one wide, one mid, one detail — and you’ll land naturally in Zillow’s fastest-selling 22–27 photo range, with detail shots that make reels far more interesting to sequence.
The five mistakes that mark a listing as amateur
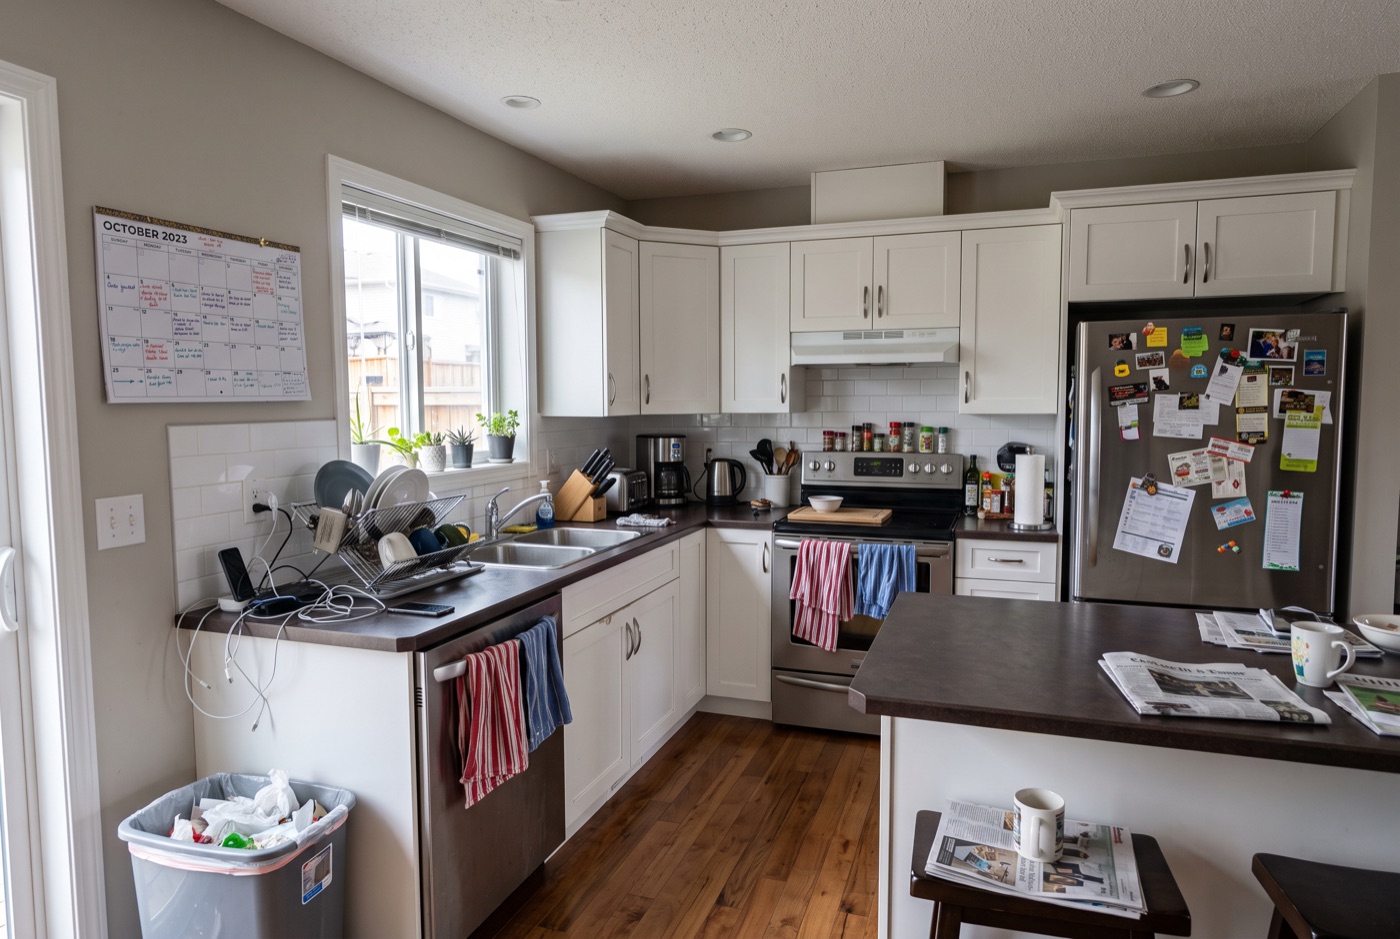
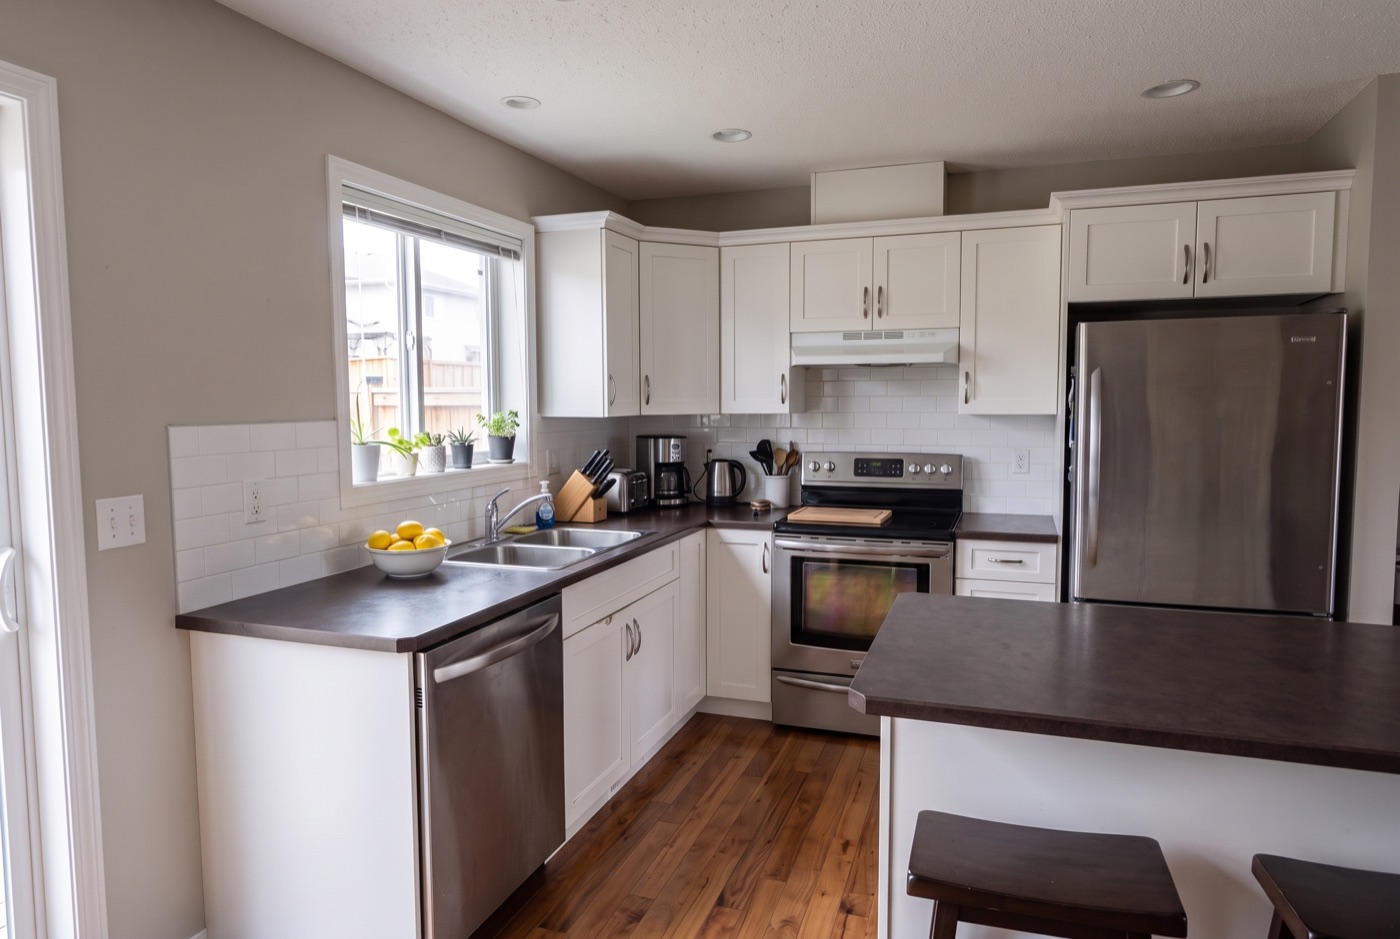
- Clutter. Counter appliances, cables, personal photos, bins. Declutter before the shoot — ten minutes of moving things beats any edit, and heavy retouching is a compliance risk anyway.
- You, in the mirror. Shoot mirrors and glass at an angle, never straight on — and scan every reflective surface (oven doors, framed art) before you press the shutter.
- Bathroom tells. Toilet lid down, bins and brushes out of frame.
- The fake-HDR look. Glowing window edges, radioactive color, flattened shadows. Rules are tightening here too: MLSs already prohibit edits that misrepresent the property, and California’s AB 723 (from Jan 2026) requires digitally altered listing photos to be disclosed — even “turning on” a light in editing counts. The standard to aim for: the best version of the property that is still the property.
- One orientation. MLSs want landscape; Reels and TikTok are vertical. Shoot the hero of each room both ways while you’re standing there — the vertical set is your social ammunition.
Where the photos go next
A set shot this way — level wides, matched light, real details — doesn’t just list better. It’s exactly the raw material a listing reel needs: an establishing exterior, decision-room wides, and vignettes to cut to. The sequencing guide covers the order; Kadapt does the rest from an upload — it reads your rooms, sequences the walk-through, adds real camera motion, and stays on the rooms you actually shot.
Common questions
Should I turn the lights on or off for real estate photos?
Lights off when the room has strong window light, light-colored walls and no showpiece fixtures — you get cleaner, truer color. Lights on when the room is dim or windowless, or when the lighting design is part of the sell. Never mix the two in one room without matching bulb color temperatures.
How do I stop windows blowing out white in listing photos?
Tap the brightest area of the frame to set exposure and let the phone’s HDR merge do the rest, shoot across the window rather than straight at it, and brace the phone so the exposures align. If a window still blows out, come back when the sun isn’t hitting that side of the house.
What height should I hold the phone for interior photos?
Chest height, not eye height — about 4–5 feet. You see furniture surfaces and floor space instead of the tops of cabinets, and the room reads the way it feels to stand in it. Go a little lower in dining rooms, a little higher in kitchens.
How many photos should a listing have?
Zillow research found listings with 22–27 photos sell fastest. Shooting one wide, one mid-range and one detail shot per room lands you naturally in that range.
Turn today’s photos into today’s reel
Make my first reel →Free to the plan, no card · card only when you render · 14-day trial, 3 reels